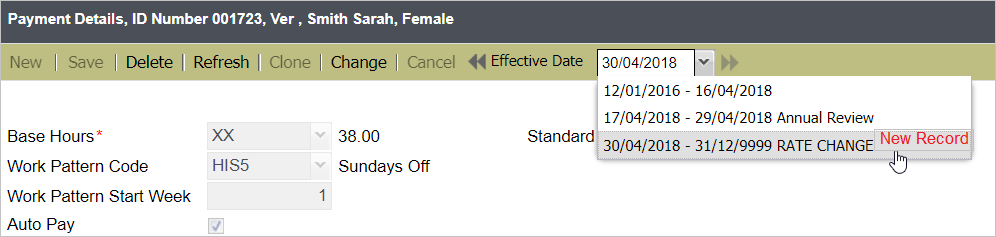
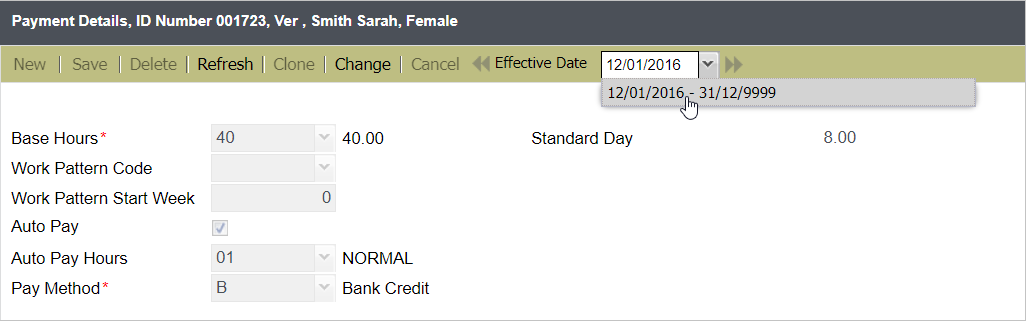
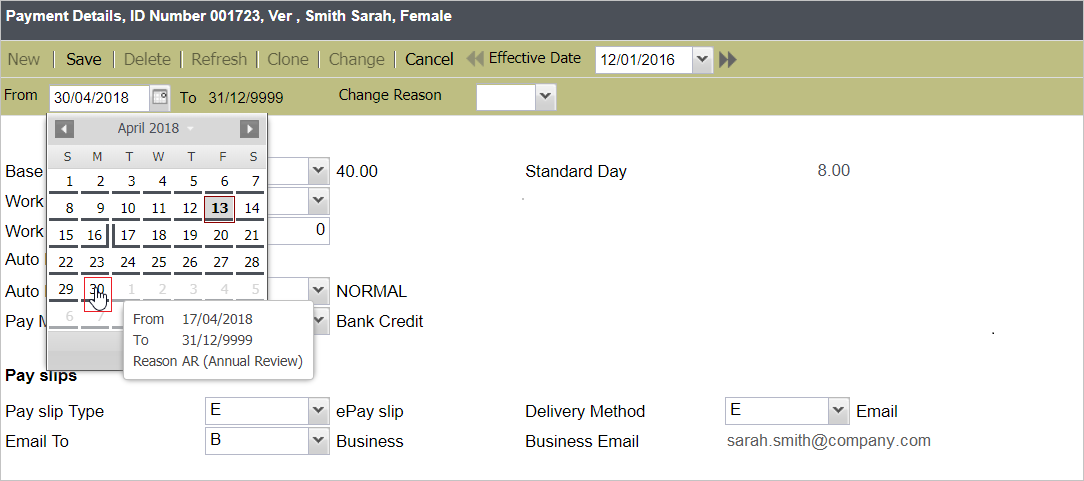
- On the selected employee record, click the Change button.
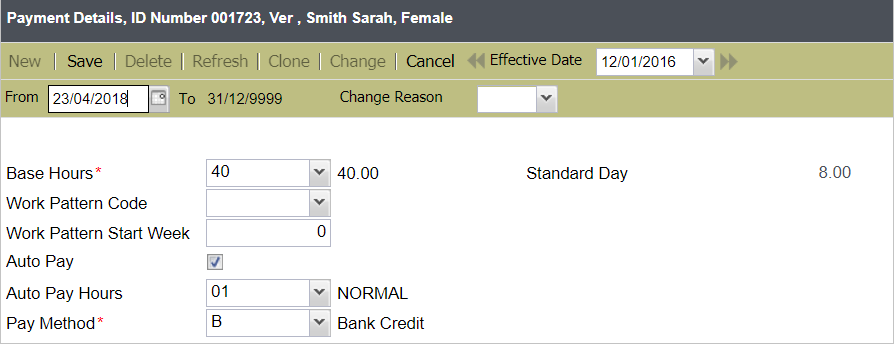
- Select the From date via the Date Picker or manually enter the From date.
While you can change the From date, the To date is automatically populated. Since the new record being created has a From date (e.g. '31/04/2018') that is after the latest record (see above screenshot), the To date for this new record is now set to infinity '31/12/9999'.
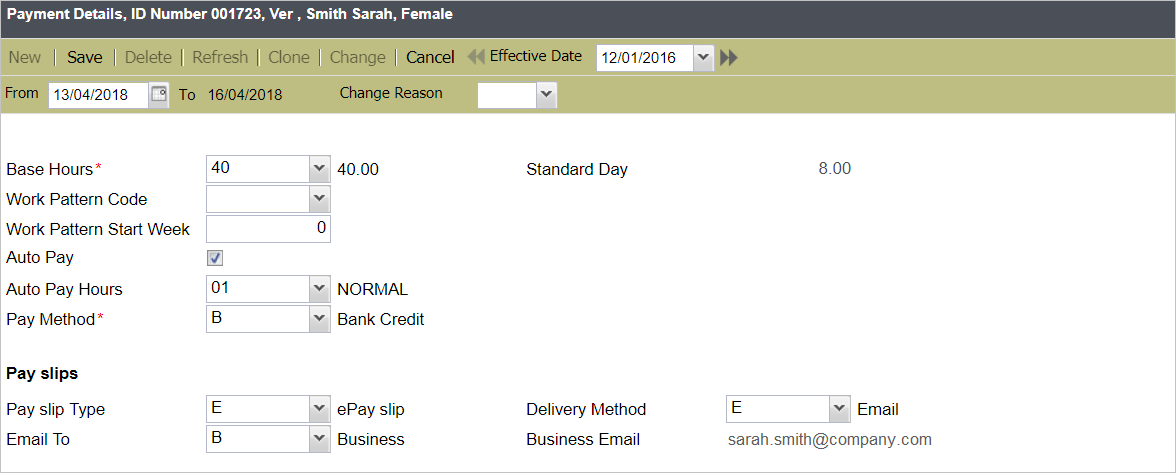
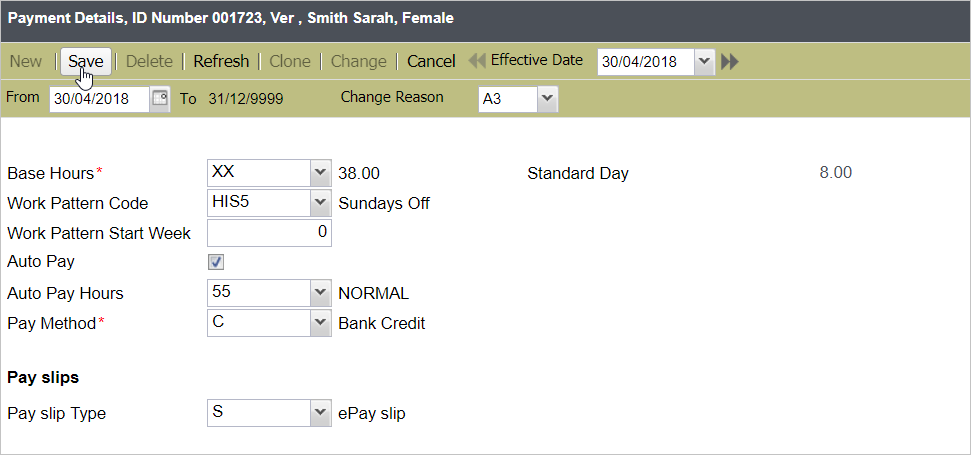
- Enter the values for the new record, and click Save.
- A message will display informing that the record has been saved successfully.
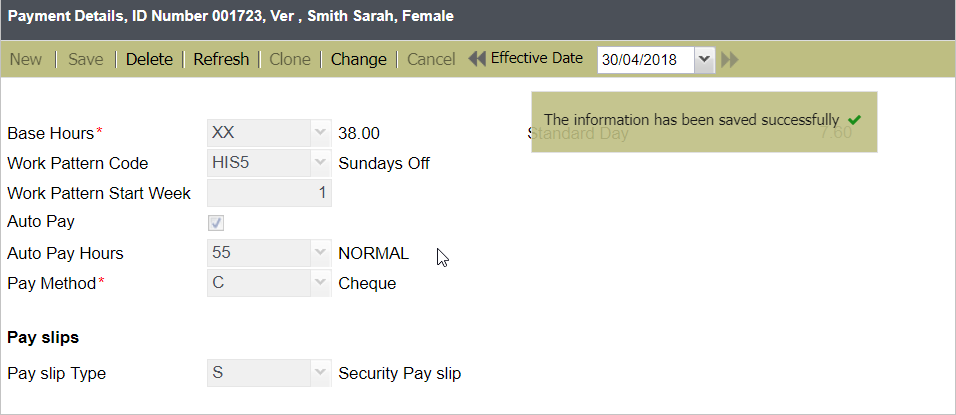
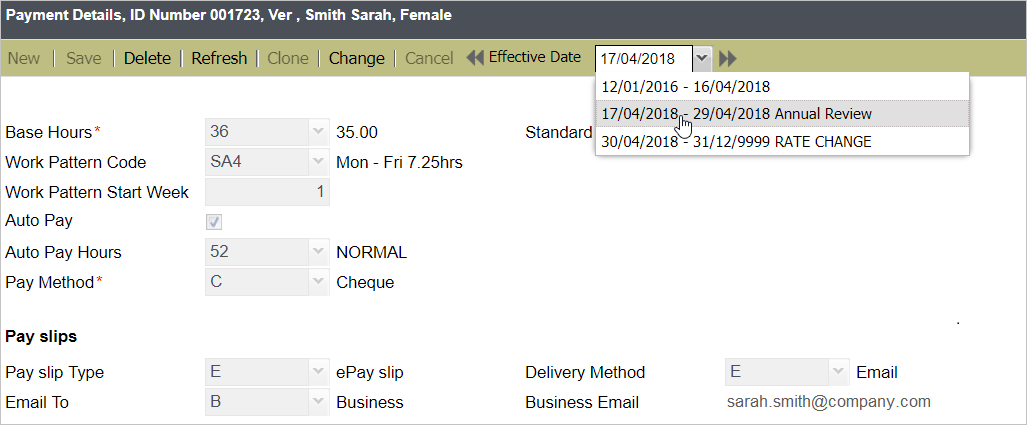
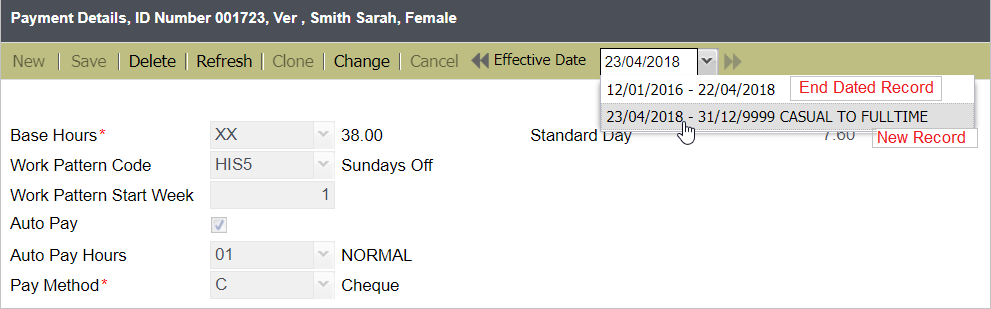
As you check the effective dated records, the record with From date '17/04/2018' now has an adjusted To date that is 'latest record From date - 1' or '29/04/2018' (i.e. previously infinity). The newly created record is now the latest record with a To date of infinity '31/12/9999'.